

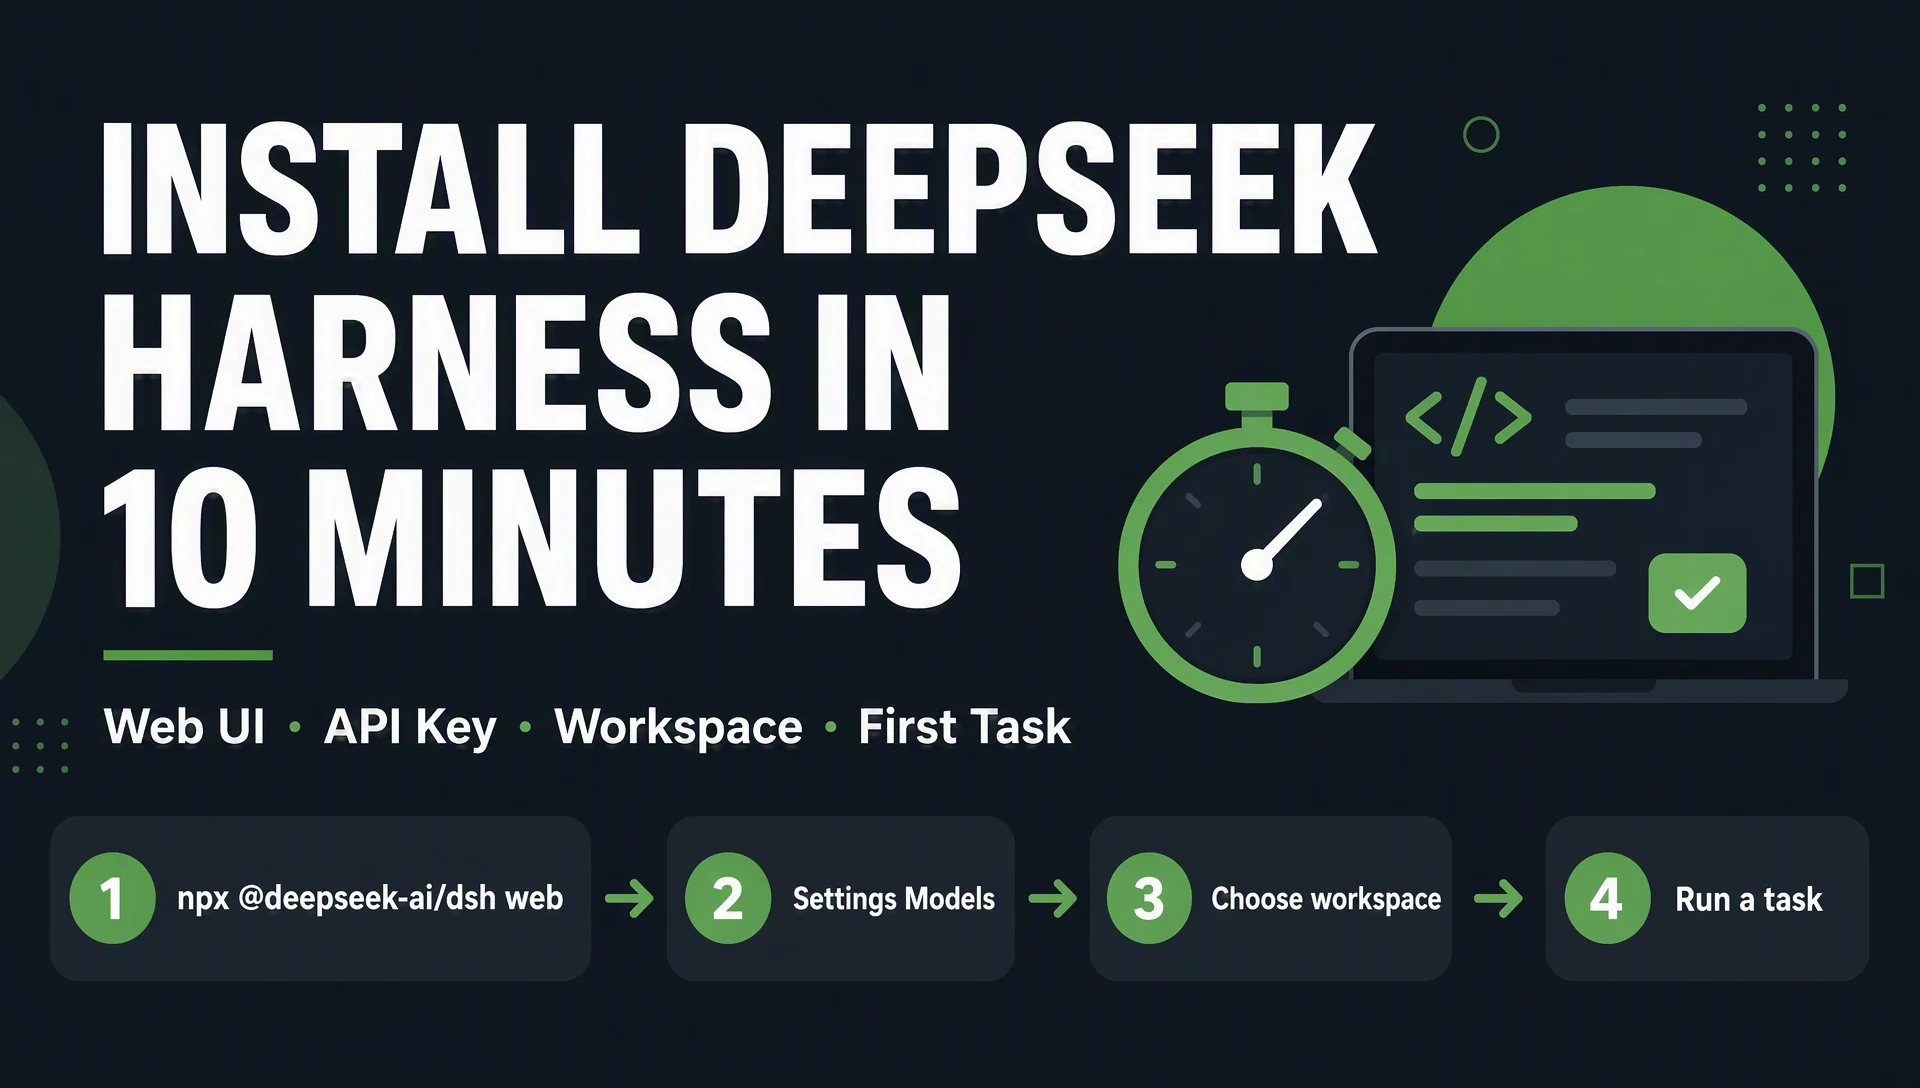
What you'll finish with
This guide is written for people who've never touched DeepSeek Harness — SEO folks, content people, small site owners, not necessarily developers.
By the end, you will have:
- DeepSeek Harness running locally with the web UI open in your browser
- A working API key configured
- A workspace connected to a real folder on your machine
- One completed task, answered by the agent inside your workspace
- A bonus: the one-line command that runs a task and exits (headless mode), which you'll use later for automation
Time: about 10 minutes. Prerequisites: a computer with internet access; installing Node.js is part of the steps. What "done" looks like: the web UI at http://127.0.0.1:3080 answers your first prompt with a real result — not an error.
Before you start: what you need
Item | Needed? | Notes |
|---|---|---|
Node.js 18+ | Yes | One-time install; the |
DeepSeek API key | Recommended | Only needed to run tasks, not to boot the UI; you can add it later |
A project folder | Recommended | The agent works inside a folder (its "workspace") — pick the folder with your content, drafts, or site files |
Terminal access | Yes | You'll run one command |
If you already have Node.js, skip straight to step 1. To check: run node --version — anything 18 or higher is fine.
Step 1 — Install and boot the web UI
Open your terminal and run this single command:
npx @deepseek-ai/dsh webOn first run, npx downloads the package, and the launcher prints the address of the web UI:
dsh web: http://127.0.0.1:3080Open that address in your browser. You'll see the DeepSeek Harness web UI — currently branded "Into the Unknown / Preview" — and a first-run notice explaining that the tool is a developer preview with rapidly evolving plugins and APIs. Click Continue.
That's the whole install. No account, no license key, no download page. The first-run notice is worth reading once: it's DeepSeek's own framing of what 0.1 is — an honest preview, not a finished product.
Step 2 — Add your API key
The UI boots without a key, but the composer stays disabled until it can reach a model. Click Settings (bottom of the left sidebar), then Models.
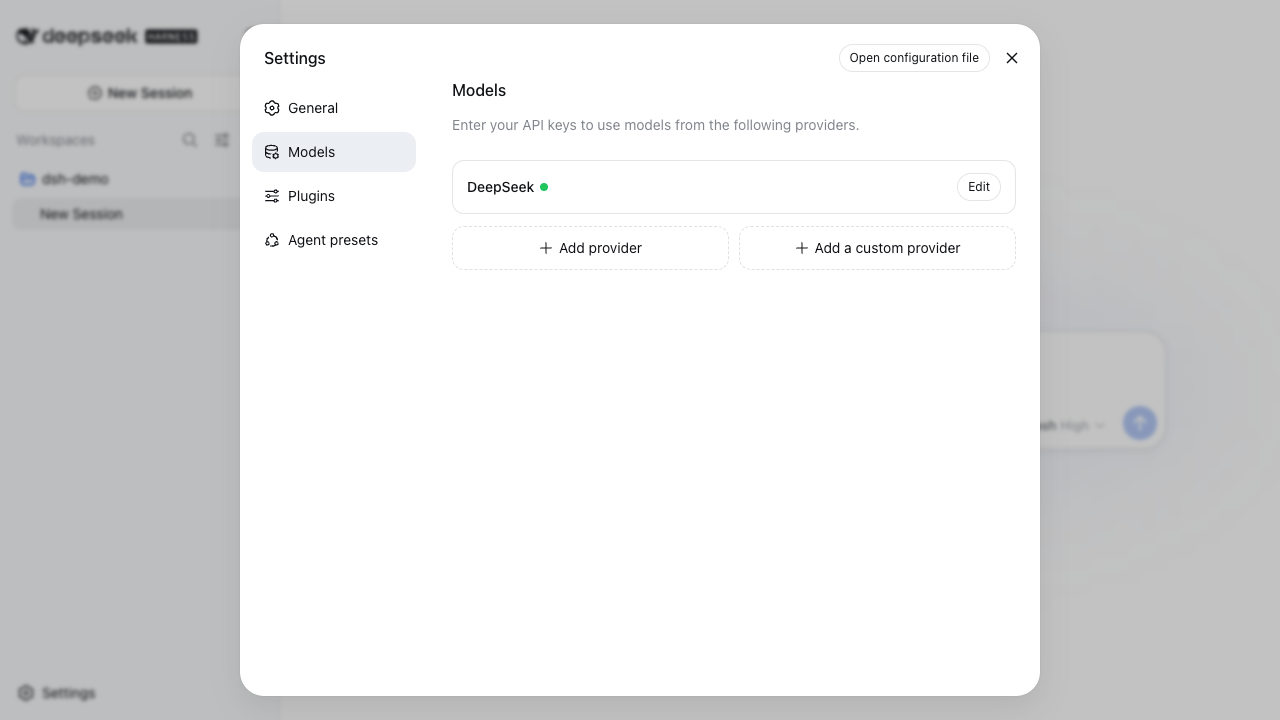
Settings → Models. Once a key is saved, the provider shows a "configured" badge.
Click Edit next to DeepSeek and paste your key. The field never displays your key — even after saving, it shows the placeholder "Configured — enter a new value to replace," so your key stays masked.
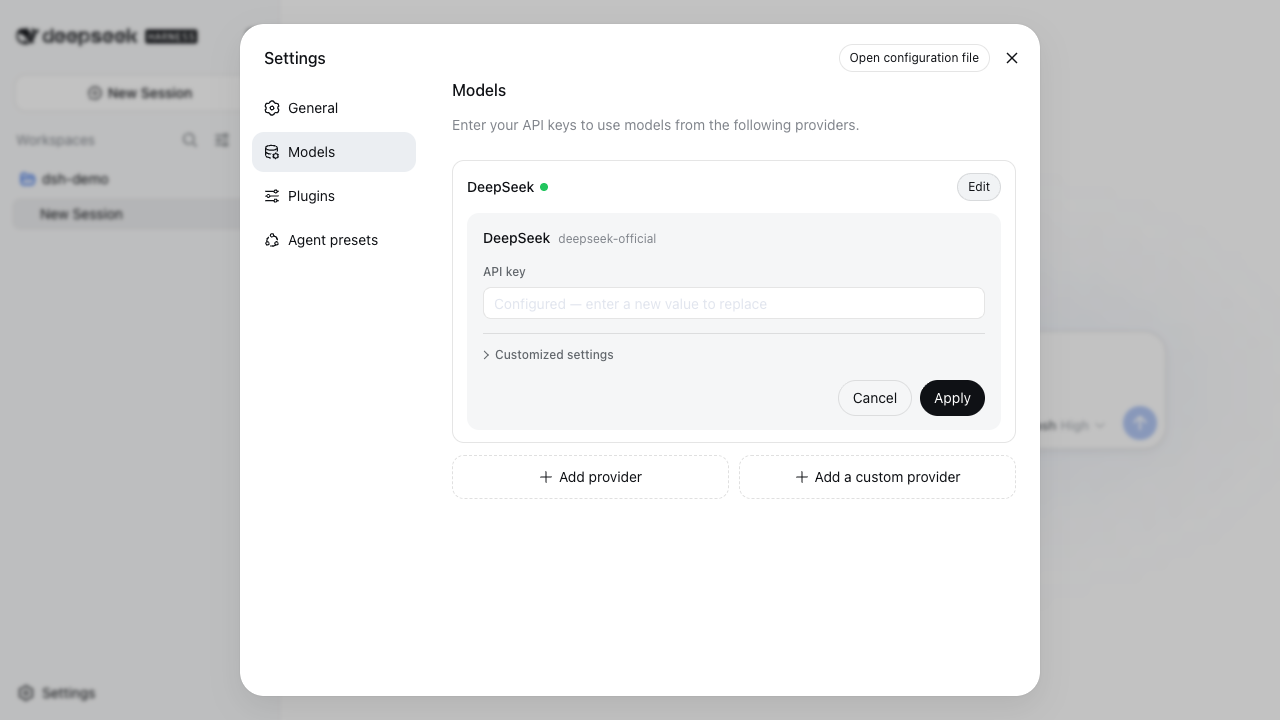
The key field is write-only by design — your key never appears in the UI after you save it.
Click Apply, close Settings, and the model route is usable immediately — no server restart needed.
Step 3 — Choose your workspace
A workspace is simply a folder on your machine that the agent can read and work in. The composer stays locked ("Choose a workspace to start") until one is selected.
Click Add workspace in the sidebar (or Choose workspace in the main area → Add workspace…) and pick any folder. For your first run, a folder with a couple of files in it is ideal — the agent has something to read.
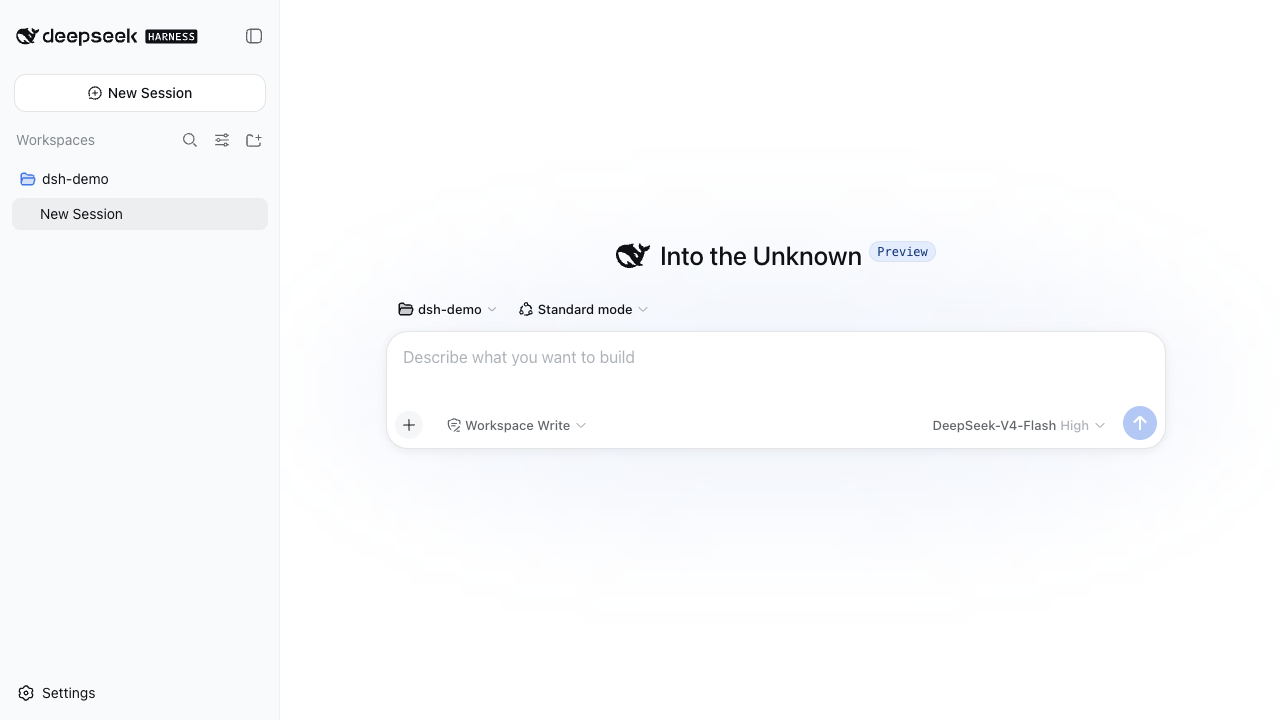
Ready state: workspace selected, Standard mode, model + reasoning effort visible in the composer.
Step 4 — Run your first task
Type a task into the "Describe what you want to build" box and press send. The official docs suggest starting with a repository summary; for a non-developer first run, try something closer to your work. This is the exact first task I ran for this walkthrough, in a workspace containing a one-page company file (about.md):
Read about.md in this workspace, then summarize the company in 3 sentences
and suggest 3 keywords the site should target for SEO.
What happened, in order (you'll see each step in the message flow):
- Context injection — the agent loaded its system prompt and skill catalog
- Think — it planned: read the file, summarize, suggest keywords
- Read about.md — a real tool call on the file in the workspace
- Answer — a three-sentence summary plus three keywords, each with a reason
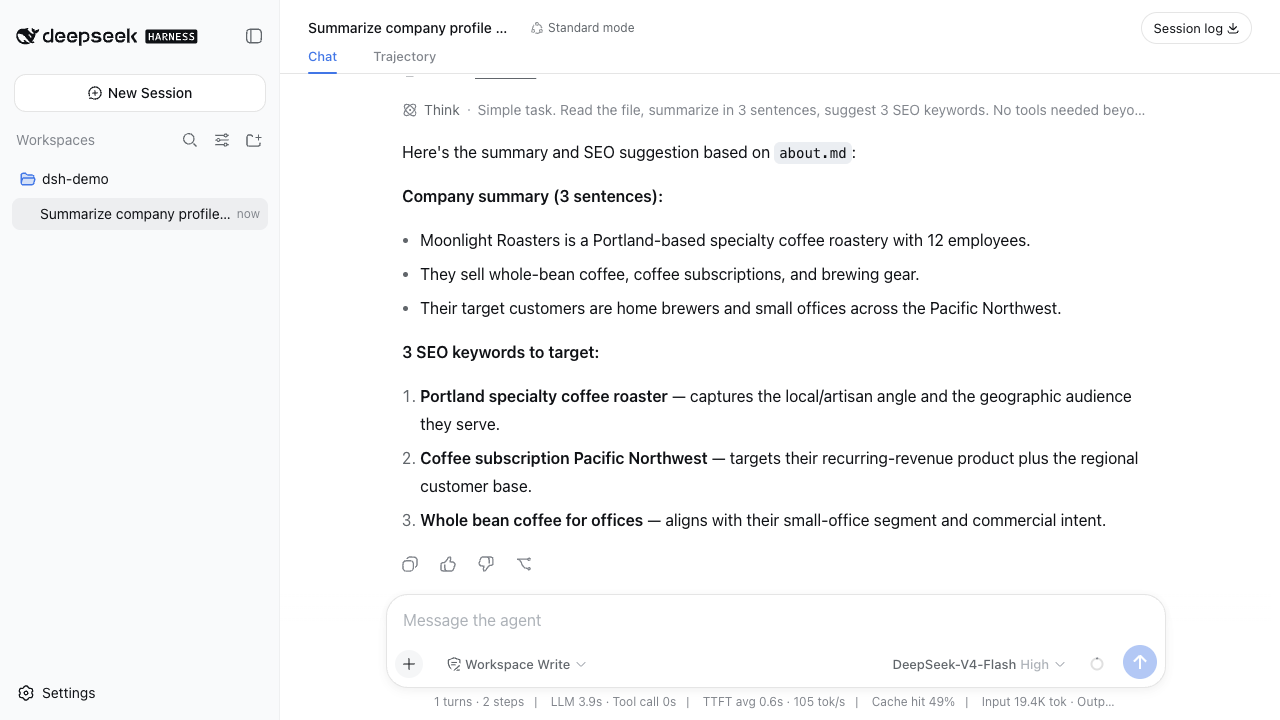
The first task in progress — message flow on the left shows every step, including the Read tool call.
The answer came back with useful metadata under it: 02:05 · Ran for 3s · TTFT 0.6s · 105 tok/s — total session time, active run time, time-to-first-token, and token rate. The keywords it suggested ("Portland specialty coffee roaster," "Coffee subscription Pacific Northwest," "Whole bean coffee for offices") were grounded in the actual file — which is the whole point of working in a workspace instead of a generic chatbot.
The Trajectory tab next to Chat shows the complete session log — system prompt, context snapshots, every tool call — which is also what makes the harness auditable later when you run real SEO/GEO jobs.
Advanced path — one-shot tasks with headless mode
The same engine runs without the UI. This is the command you'll use later for scheduled monitoring (covered later in this series), and it's a quick sanity check that your setup works end to end:
dsh --profile headless "your task here"It boots a profile, runs one fresh session, prints the final answer, and exits. A real example from this walkthrough:
dsh --profile headless "In one short paragraph, explain what generative engine optimization (GEO) is and why it matters for a small business website."And the actual output:
Generative engine optimization (GEO) is the practice of structuring a website's content so that AI-powered answer engines — like ChatGPT, Perplexity, Google's AI Overviews — can easily find, understand, and cite your business when people ask them questions. Where traditional SEO optimized pages for ranked blue links, GEO optimizes for being named as a source inside an AI-generated answer... In short, GEO is the new front door to your business, and ignoring it means letting AI recommend everyone but you.
One command, one answer, no browser needed. That's the building block for the automation workflows in this series.
Fix common problems
Symptom | Cause | Fix |
|---|---|---|
| Node.js not installed | Install Node.js 18+ from nodejs.org, restart your terminal, retry |
Port 3080 already in use | Another app (or a second instance) on the port | Run with a different port: |
Composer stays locked / "Choose a workspace to start" | No workspace selected | Add or choose a workspace in the sidebar (Step 3) |
"API key" errors on send | Key missing or wrong | Settings → Models → Edit → paste key → Apply (Step 2) |
First task is slow | Cold start on first run (downloading plugins, model warm-up) | Normal — wait; later tasks run faster |
Version mismatch warnings | Developer preview updates often |
|
Headless mode says session created but fails to attach | Workspace path mismatch (macOS resolves | Use the real path ( |
Verify your setup
- [ ]
npx @deepseek-ai/dsh webprintsdsh web: http://127.0.0.1:3080and the page loads - [ ] Settings → Models shows your provider with a "configured" badge
- [ ] The composer is unlocked with your workspace name visible
- [ ] A real task returns a grounded answer (not an error)
- [ ]
dsh --profile headless "say OK"prints a result and exits
If all five check out, you're installed and operational. The next step is putting the harness to work: SEO workflows with copy-paste prompts, then GEO citation audits and automated monitoring — the rest of this series.
FAQ
Do I need to install anything besides Node.js? No. npx handles the harness itself. Everything else (plugins, web UI) is bundled and initialized on first boot.
Can I run DeepSeek Harness without an API key? You can boot the UI and explore, but tasks need a model — add a DeepSeek key in Settings → Models (Step 2).
Where is my data stored? Locally — sessions and config live in ~/.dsh/ by default. The tool runs on your machine; nothing is uploaded unless you use cloud plugins.
Why does it say "Internal Testing Notice" and "Preview"? DeepSeek Harness 0.1 is a developer preview. DeepSeek explicitly warns that plugins and APIs will change. It's usable now — just don't build irreversible automation on it without version pinning.
What's the difference between `dsh web` and headless mode? dsh web boots the browser UI; headless (dsh --profile headless "task") runs one task and exits. Same engine, same workspace, different interface — headless is the automation path.
Other articles in this series
- What is DeepSeek Harness? A Beginner's Guide to the 93k-Star Open-Source Agent Platform
- DeepSeek Harness for SEO: 7 Workflows with Copy-Paste Prompts
- DeepSeek Harness for GEO: How to Get Cited by ChatGPT, Perplexity & Google AI Overviews
- 35 Copy-Paste Prompts for SEO & GEO Work in DeepSeek Harness
- Build Your First Automation: Weekly GEO & SEO Monitoring with dsh Headless Mode
- DeepSeek Harness CLI Cheat Sheet + Troubleshooting for Beginners
Author: Nathan Reed, AI Marketing Workflow Designer for 80+ Growth Systems at Auspia. Nathan writes about AI workflows, tool setup, and repeatable growth systems for small teams.